Automate image annotation and merge in macOS
macos hackWhen we send a pull request for customer-facing change in Airbnb, it is highly recommended to attach the before vs. after screenshots or screen recording for demonstration.
For the before-vs-after screenshots, I usually
- take two screenshots with selected regions.
- annotate images with
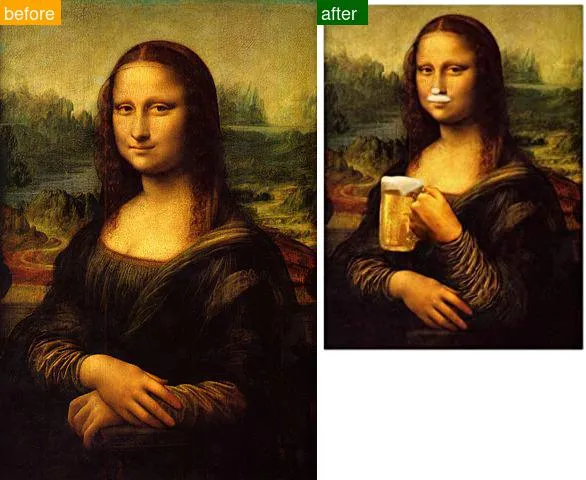
beforeandaftercaptions - merge them to a single image,
before-and-after.
We can consolidate step 2 and 3 as one-liner:
/usr/local/bin/gm convert -append -font helvetica -pointsize 18 \
  -draw "fill orange rectangle 0,0 60,24  fill white text 4,20 before" \
  before.jpg +append \
  -draw "fill darkgreen rectangle 0,0 50,24  fill white text 4,20 after" \
  after.jpg +append \
  before-and-after.jpg
Here is what we get, — the images might be misaligned due to the different dimensions of the screenshots1:

We can create a zsh alias to save some typing as:
before-and-after() {
  echo "annotate $1 + $2 => $1:h/$1:t:r-and-$2:t"

  /usr/local/bin/gm convert -append -font helvetica -pointsize 18 \
    -draw "fill orange rectangle 0,0 60,24  fill white text 4,20 before" \
    $1 +append \
    -draw "fill darkgreen rectangle 0,0 50,24  fill white text 4,20 after" \
    $2 +append \
    $1:h/$1:t:r-and-$2:t
}
And you can invoke the zsh alias as:
before-and-after before.jpg after.jpgIntegrate as Quick Action
Since all screenshots are saved in the desktop by default, it is hard to find the two most recent images in the terminal. It is easy to identify them in the Finder though: just sort the files by Date modified in the descending order. So I think it makes more sense to manipulate the images in the Finder instead.
We can register a new service with Automator:
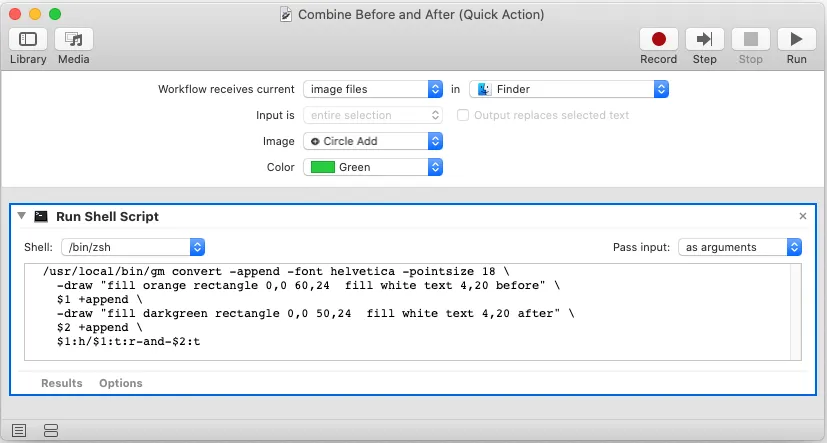
- Create a Quick Action in the Automator
- Drag the Run Shell Script block and configure the input / output as:

Or you can unzip this package, and then import it via Import Actions…2
You may encounter the Operation not permitted error due to the new sandbox
security policy introduced in Catalina, see this howto for step-by-step
guide how to grant the Finder with Full Disk Access privilege.
Here is a screencast to show how it works, — I need to select the before and after in the correct order.
What’s next
In the next post, we will discuss how to convert the video to GIF.
Spoiler alert: we will use docker image and explore the user interaction for Automator. Stay tuned.